Showing posts with label broke. Show all posts

Wednesday, August 6, 2014

Upcycled Corkboard: Chalkboard Edition

Hello there! I know its been a while but hey, what can I say? Being young and broke means there's not always time (or money) for the crafty part. Sometimes you come home from work and even desiring to do anything but watch Netflix while lying motionless is an uphill battle, amirite? So let's dive right in!

My aunt's 60th birthday is this Monday. (UPDATE: Just to let you know, I started this post in February. It's now August. I can't even excuse that one. Anyway...) Now, she's a spunky lady and has been taking her age very gracefully as long as I've known her. We've had a tough couple of years in this family... we lost our matriarch, my uncle (her husband), and there's been some family discord... without going into too much detail, I just decided it was time to try to bring some harmony back in with a surprise party! We've never done much in the way of surprises so it's uncharted territory. She doesn't have Facebook so it's been really easy to hide all the planning, haha.

Our theme is "Take Me Out to the Ballgame!", specifically the New York Mets (we have some Yankee fans in the family too) because she is certainly a die-hard fan. She would tell me about how her and her father would listen to the games growing up and we have many, many, MANY photos from great games at Shea and Citi Field back when we had season tickets. What can I say, orange and blue runs through our veins.

I decided to take on a few projects to make this party pop without shelling out tons of dough on Mets-branded party supplies -- not that you can find any around here! We're in the tri-state area but Yankees and Red Sox run the show in most retailers. To be a true Mets fan is to accept disapointment I suppose. :P One project was turning an thrift store corkboard Ms. E and I bought a long while back into a chalkboard scoreboard. We have a problem with corkboards and our desire to bring home even the weirdest, most tattered and this one was no different. It was water stained and a bit torn up on the front. We were going to recover it much like the command station one a while back but instead, it sat in the corner until I cooked up this idea and dug it out. Shall we get to it, then?

First step's first... I decided to take a risk and see if I couldn't just paint the back of this thing with chalkboard paint. Turns out, yes. It's got a bit of texture to it but its quite nice, very vintage feeling. If you'd like less texture, I suggest priming it first with a couple coats of flat paint but... honestly, too lazy. You're going to want to start this process early...

Nice, long strokes...

This particular brand suggests you give it 4 hours between coats and 3 DAYS of curing before you start to use it. So plan accordingly! Once you've let it cure, its time to start designing. So I'm doing a scoreboard, but this can easily be turned into a inspirational message board or just a very decorative chalkboard -- the sky is the limit! I needed to lay down some lines so with a ruler, a yard stick, and a paint pen, I went to it.

My board was 3' wide by 2' tall. I left 7 inches at the top for my header and the inning numbering then each team slot was 4.5 inches tall and the bottom 6 inches were reserved for the ball, strike, and out tallies. Each inning was 2.5 inches wide with the runs double that at 5 inches and I left the rest for my team names.


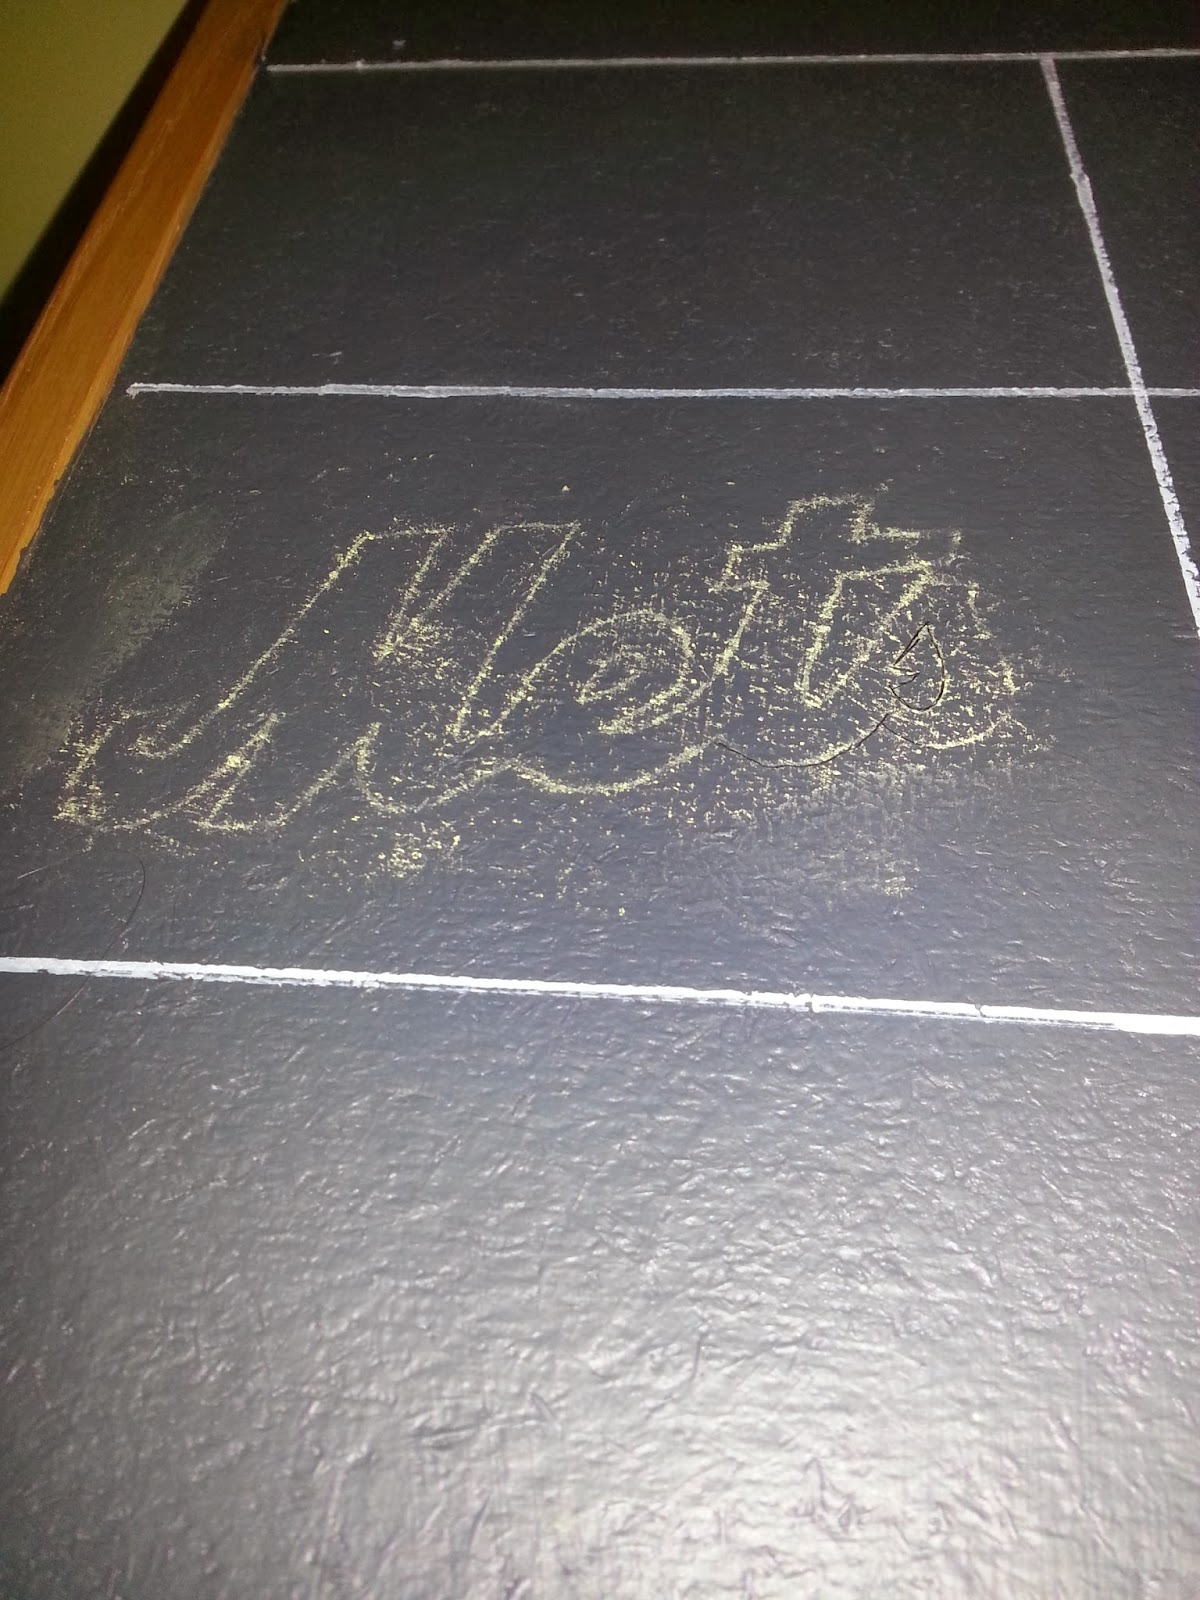
The easiest way I know to transfer in this case was printing out my logo then covering the back with a nice, healthy layer of chalk. I then traced the front of the image, leaving a nice, faint chalk outline to fill in! I did this with all my lettering.
The Sharpie paint marker proved a little frustrating here but I overcame. I highly recommend painting with an actual acrylic and a liner brush.


The finished product! It took me a couple hours and a lot of patience with that damned marker but VOILA! The perfect present. :)


Sunday, June 23, 2013

Dying Hair Extensions

As some of you may know, I have pretty short hair.  It used to be almost a pixie cut, but has grown out just about to my shoulders in the last year.  I have always been changing my hair (cutting and growing it out again, as well as colors) and though I loved my short hair for about a year and a half, it's time to be able to throw it into a bun again if it's bothering me.

(If you want some creative ideas for ways I put my short hair up/back let me know!)

 This is the length of my hair now:
I apologize for the way my face looks. Oh boy.

Around my birthday, I purchased some extensions from eBay, which were a super light blonde (way lighter than my hair) and about 24 inches long.  I trimmed them considerably shorter, although the back pieces need to be layered more to be believable, but I HAD to dye them.  Seriously, before I cut them, I called them my Legolas hair.

Things you will need:
-Hair dye (as close as possible to your actual hair color

-Hair extensions (make sure they're real hair, synthetic hair will not dye and you may or may not completely ruin them trying)

-Tin foil

-Glass bowl

-Hair dying brush, or any old paint brush you don't care about anymore.  Make sure it's about an inch wide to save yourself time and frustration.

-Comb

-Makeshift drying area (I used a piece of twine tied between a cabinet and a chair with towels under it.)

The Process

Step 1: Lay out everything you need. Place sheets of tin foil over the table/floor that are about an inch longer than each weft of hair.  You can fit one large piece or two smaller pieces per sheet of tin foil.

Step 2:  Comb out each weft of hair carefully!  Don't pull at snags, you'll just rip the hairs out, and those don't grow back.  After combing out, place lengthwise on sheets of tin foil.

Step 3:  Mix hair color according to directions (I added a little but of the conditioner it came with into the mix) in a glass bowl.

Step 4: Using the paint brush, completely saturate each weft with the hair color.  Seriously, it's painting, and you don't have to be any good at it, I promise.  After each weft is covered, flip it over and cover the back side. THIS IS IMPORTANT.  If you don't cover the back side as well, you're going to get nasty patchy pieces and that's not cute.  Also make sure you get the parts right at the base of the clips.

Step 5:  Once both sides of the hair pieces are covered, fold the tin foil over the hair.  I folded the long sides in the meet in the middle, then folded the top and bottom over and folded the whole thing in half (so the folded-short ends were touching) and let them sit for 25 minutes to an hour.  Depending on the dye you use, it may need a little bit longer to fully absorb the color (semi-permanent dyes can be left for a couple hours if you want) but for permanent colors (box dyes) you may only want to let it sit for half an hour because they're a bit more drying.  Use your best judgement and check the progress of the color often.

Step 6:  After the hair is done absorbing the color, rinse them out with cold water.  The colder the water the better because it smooths the hair shaft, locking in the color.  No shampoo is necessary, but if you feel like you need to condition them as well, rinse thoroughly and then apply conditioner and rinse again.

Step 7:  Set up your make-shift drying area and clip hair wefts to the line.  Air dry, then spray with a leave-in conditioner or heat protection spray before combing the wefts out again.

I know this seems like a lot of work, but honestly it's mostly waiting time between painting and rinsing, then drying and using the extensions.  Over all, from start to finish, it took me about 3 hours (1 hour of prep and painting, 1 hour of waiting, and one hour of rinsing and drying time).

Wednesday, June 19, 2013

Halfway Homemade Pizza!

Who doesn't love pizza? That's right, nobody.  Kaeley and I had our friend Cat over and made some amazing pizzas.  We bought the dough because A) we were lazy, and B) we were so hungry we couldn't have enough patience to make it ourselves.

We had three pizzas in the end.
The top: mushroom and pepper, the middle: bacon, spinach, avocado, and the bottom: BBQ chicken, onion and bacon.

We used our crockpot to cook chicken strips in BBQ sauce while Kaeley prepared the bacon, onions and sauces.

Then we chopped up all of our toppings and tried to stretch out the pizza dough, which isn't as easy as people who work in pizza places make it look.


We used regular tomato sauce on the veggie pizzas but used BBQ sauce as the base for our BBQ chicken pizza.  They take about 10 minutes in the oven at 350 degrees.  My favorite was the spinach avocado and the BBQ chicken pizza.  Definitely making more of these in the near future!

Monday, June 3, 2013

Ideas! And Plants!

Oh my goodness. Okay, it's 2:30 in the morning right now, but I can't sleep because I have come up with a (near) genius idea.  I'm not entirely sure if I should tell you what it is right now, but I will soon! (a.k.a. as soon as I get all the materials in the mail).


Let me know what your favorite scents are, and I will let you know what my ideas is. ;)  Happy Tuesday everyone!


Our plants have started sprouting!  Everything is just so exciting right now. =)

Tuesday, May 28, 2013

Project Life Part 1

A Beautiful Mess is one of my absolute favorite blogs that I follow.  A while back, Elsie had started talking about this Project Life project she was starting and, to me, it sounds like an amazingly sweet way to capture the good things in life in a little book.  Her posts about Project life can be found here and here!

The idea and the foundation of this project can be found at this site, along with some ways to get started and buy supplies.  Frankly, I have a couple of $5 cardstock books from WalMart and a wire-bound sketch pad that I'm planning to transform for the project in the near future.

I will be posting some pictures soon (a.k.a. when I actually print pictures to start the book) in Part 2 and keep you updated as I go along through the year.

Wednesday, May 22, 2013

DIY Upcycled Corkboard

Well hello dere!

It's been a lovely few weeks here with the wonderful Miss E and we've finally had a day off together that didn't involve family parties (birthday, mother's day... all the days!), distracting boyfriends, or general exhaustion. We set out to do ALL THE THINGS. Well, we did some of the things... and ate a lot of food.

One of the things we tackled today was setting up our new "Command Center" in order to make sure we're both on the same page. You know, when you just don't catch the, "I won't be home for dinner tonight", as the other person whizzes past with a bagel in their mouth. Also known as "every morning".


Anyway, so here's how we started! I grabbed this currently defunct cork board from work. Now, someone obviously snagged it in the past from either a liquor store or a restaurant considering the fact it's a booze promotion. It's really just a red wooden frame with a cork board on one side and a cheap-o blackboard on the other, nothing super high end. Ask around non-chain restaurants/bars or liquor stores if they have any they're not using. I have to imagine they get more of these than they could ever even use...


Moving on... so we covered it! Because frankly, I prefer wine and no one in my family needs further reason to poke fun at my affinity for the drink or my inability to stop giggling after one or two. We used some leftover scrapbook paper rather than going out and buying poster backing. Since the dimensions on this particular cork board meant we needed at least three pieces of the same paper (we didn't have that), we opted to create a border around two pieces we liked. I simply just cut down the middle of the blue patterned paper (no need for a pretty edge, you're just going to hide it under the square bits in the center). The paper is stapled on so in the future, if we want to swap it out, no big deal. I toyed with the idea of modge podging it on or using the foam adhesive squares but eh, I wasn't that motivated. A few staples did nicely.


You could easily stop here and have a pretty nice corkboard. But we're overachievers and wanted to be able to catch our mail on this "command center". So I stole borrowed some bully clips from work to hang from the edge of our board. Originally, I planned to just use a few small nails and hang them that way. While I was searching the drawers for the plastic case, I began to realize my mother may have taken them with her when she took her tool kit to the new house. D'OH. But I found something  better! Small screw-in hooks! We so fancy.


First, I measured out how much space I was going to need between the hooks. We had enough room for eight of them. I made my marks and lightly tapped a thumbtack to make a starting hole for the hooks to thread on to. They weren't too hard to screw in, you can get about halfway with your fingers before succumbing to pliers.

But be careful you don't accidentally break the hook with your She-Hulk force...
Oops. This is when you cover the broken post with red marker, whistle innocently, and screw a second hook in right next to the broken one...


Here's the finished product! Easy peesy lemon squeezy, right?

Let the pinning begin!


Sunday, April 21, 2013

DIY Party: Wall Decor

I have always been obsessed with fun backgrounds for photos.  It's always fun to be able to take pictures at parties and have something pretty or exciting behind you instead of someone's backyard, right?  Enjoy the compilation I've put together and please share some of your own ideas, I'd love to hear them!

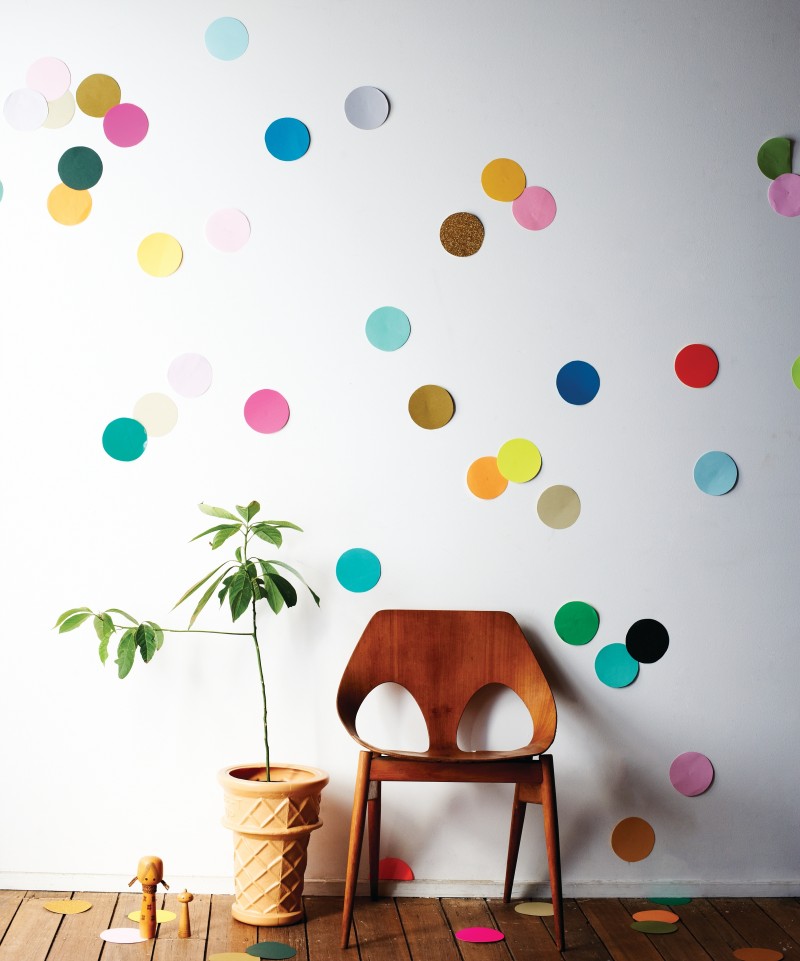
Wee Birdy has a very cute and very simple (READ: easy) idea with this giant wall confetti!

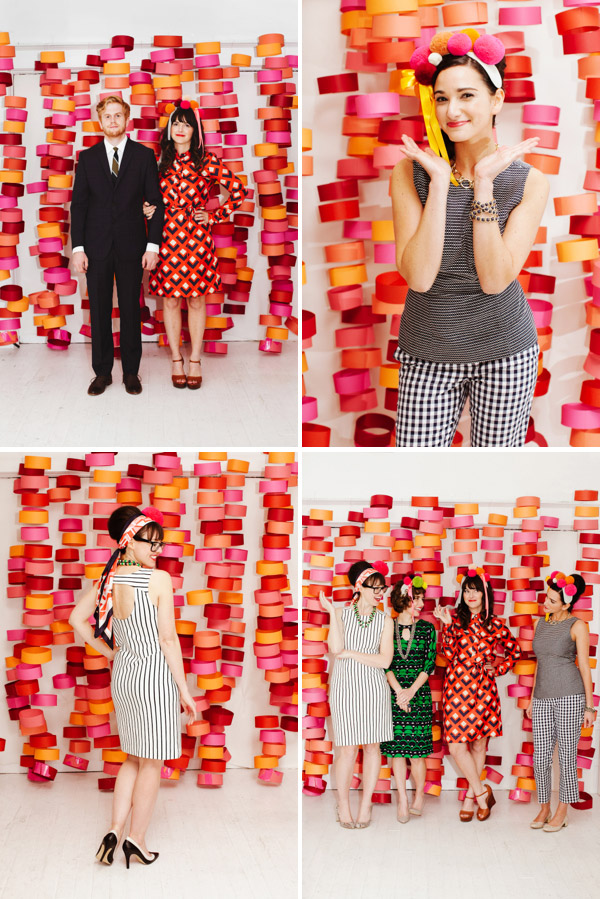
Now, this picture from Oh Joy! didn't seem to have any instructions with it, but I love this idea!  If you take streamers or ribbons or whatever you would like for the background and sandwich the tops of the strands between two pieces of tape, you would easily be able to hang it on a wall or between two posts.
Oh Happy Day had a cute idea for a circle photo booth backdrop, which is absolutely adorable.  However, to make it a little less complicated, you could swap out the sewing machine and just tape the insides of the circles to the thread.

For holiday times, I love string lights as a backdrop in pictures.  Instructables has a neat How To to make the lights diffused and less glaring by covering the little bulbs with ping pong balls!

Speaking of string lights, I have been absolutely in love with this idea since I first saw it on Pinterest.  I have a sincere love for canvas, which is how we plan to decorate most of the rooms in our home once everything gets settled.  Apartment Therapy combines those two things (lights and canvas) with some stickers and spray paint and showcased some absolutely lovely wall art.  I can just imagine the huge ones as cute summer night backdrops or, if you use snowflakes, Christmas party/card backgrounds!

I hope you liked some of these!  Please let me know what you think in the comments below and share your ideas!

Tuesday, April 16, 2013

DIY Party: Games

Hello again!  Welcome to part two of five of the DIY Party series!  Today's topic is DIY party games.  I have found two that I really love (however they're both drinking games, so no kids allowed!)

1)  Battleshots

The Pinterest link took me to this site, which is all in Polish.  However, the concept of the game is pretty self explanatory, especially if you've ever played the ever-popular Battleship.

These two took pizza boxes and drew two grids, one on the inside of the top and one on the inside of the bottom.  You place your shot glasses into the grid as you would with your three ships in the original game (one - two spaces ship, one - three spaces ship, and one - four spaces ship).  The other person does the same with their board and then you take turns guessing where the other's ships may be.  If they call a spot with a shot glass on it, take the shot.

2) Shot Roulette

Here we have another game of shots, but this one is a little more dangerous.  Everyone who takes a turn takes a shot, the problem is you may not know what it is until after you have it in your mouth.

If you have any suggestions for more DIY Party ideas or games, please tell us about them in the comments below!

DIY Party: Centerpiece Ideas

Hey everyone!  Welcome to the first installment of the DIY Party series!  This is going to be five sections of DIY party ideas that I have found (and love!) through Pinterest and I cannot wait to start using them!

First off, I found possibly the cutest way to recycle cans from tomatoes or canned fruits.
All you have to do is clean out the can, cover with funky duct tape (which come in a thousand patterns and colors now) and add a ribbon.  So cute and simple, I can't believe I hadn't though of it before now.

Next, from Smart School House, I found this adorable and incredibly easy way to have flower lights be a part of the table without the real-life flames and fire hazard.

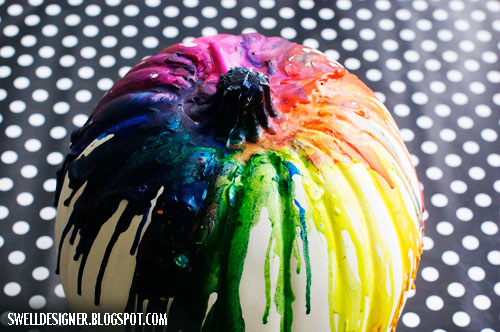
Here, I found a great fall centerpiece. Yes, I've already got my mind on fall, but when don't I?  I absolutely love this idea and I tried it last year with my preschool class but my hair dryer is cheap and didn't get hot enough so I'm determined to try again (and succeed) this year.


Finally, I saw this really cute idea on Pinterest, but the source was just the picture itself.  The idea is to have a styrofoam ball and a large candle holder.  Candle holders generally have a spike that goes through the bottom of the candle, which you will need to poke through the bottom of the styrofoam ball.  Then, poke the sticks of as many lollipops as you can fit into the styrofoam to make this cute little "Sucker Ball".

Thanks for stopping by!  Next DIY is party games!

Tuesday, March 12, 2013

DIY Massive Calendar

Hello there!  As an aspiring functioning member of society and an attempt to get my act together this year, I've created this massive custom calendar with a foam core poster board, a set of colored markers and a ruler.  Now, by no means am I perfect, but if you're anything like me, you need a big reminder to slap you in the face with bold colors so that you don't forget things like I do.
The foam board that I used was 20inX30in.  For 24 weeks worth of calendar space, I measured 1-1/4' inches down the entire 30 inch sides, leaving little pencil marks as I went.  After, I lined up the dots on one side to the other and went over it with a fine permanent marker.  Across the top and bottom (20 inch sides) I measured 2-3/4" across starting on the left to leave about a half an inch of space to mark the months.  Since I'm obsessive compulsive, I color-coded the months, blog post dates, birthdays, events and holidays as well as appointments all through the first half of the year.  I also did the back side of this with July-December's calendar, but you don't have to go that crazy!

Happy Tuesday everyone!