Showing posts with label made. Show all posts

Wednesday, June 19, 2013

Halfway Homemade Pizza!

Who doesn't love pizza? That's right, nobody.  Kaeley and I had our friend Cat over and made some amazing pizzas.  We bought the dough because A) we were lazy, and B) we were so hungry we couldn't have enough patience to make it ourselves.

We had three pizzas in the end.
The top: mushroom and pepper, the middle: bacon, spinach, avocado, and the bottom: BBQ chicken, onion and bacon.

We used our crockpot to cook chicken strips in BBQ sauce while Kaeley prepared the bacon, onions and sauces.

Then we chopped up all of our toppings and tried to stretch out the pizza dough, which isn't as easy as people who work in pizza places make it look.


We used regular tomato sauce on the veggie pizzas but used BBQ sauce as the base for our BBQ chicken pizza.  They take about 10 minutes in the oven at 350 degrees.  My favorite was the spinach avocado and the BBQ chicken pizza.  Definitely making more of these in the near future!

Tuesday, May 28, 2013

Project Life Part 1

A Beautiful Mess is one of my absolute favorite blogs that I follow.  A while back, Elsie had started talking about this Project Life project she was starting and, to me, it sounds like an amazingly sweet way to capture the good things in life in a little book.  Her posts about Project life can be found here and here!

The idea and the foundation of this project can be found at this site, along with some ways to get started and buy supplies.  Frankly, I have a couple of $5 cardstock books from WalMart and a wire-bound sketch pad that I'm planning to transform for the project in the near future.

I will be posting some pictures soon (a.k.a. when I actually print pictures to start the book) in Part 2 and keep you updated as I go along through the year.

Wednesday, May 22, 2013

DIY Upcycled Corkboard

Well hello dere!

It's been a lovely few weeks here with the wonderful Miss E and we've finally had a day off together that didn't involve family parties (birthday, mother's day... all the days!), distracting boyfriends, or general exhaustion. We set out to do ALL THE THINGS. Well, we did some of the things... and ate a lot of food.

One of the things we tackled today was setting up our new "Command Center" in order to make sure we're both on the same page. You know, when you just don't catch the, "I won't be home for dinner tonight", as the other person whizzes past with a bagel in their mouth. Also known as "every morning".


Anyway, so here's how we started! I grabbed this currently defunct cork board from work. Now, someone obviously snagged it in the past from either a liquor store or a restaurant considering the fact it's a booze promotion. It's really just a red wooden frame with a cork board on one side and a cheap-o blackboard on the other, nothing super high end. Ask around non-chain restaurants/bars or liquor stores if they have any they're not using. I have to imagine they get more of these than they could ever even use...


Moving on... so we covered it! Because frankly, I prefer wine and no one in my family needs further reason to poke fun at my affinity for the drink or my inability to stop giggling after one or two. We used some leftover scrapbook paper rather than going out and buying poster backing. Since the dimensions on this particular cork board meant we needed at least three pieces of the same paper (we didn't have that), we opted to create a border around two pieces we liked. I simply just cut down the middle of the blue patterned paper (no need for a pretty edge, you're just going to hide it under the square bits in the center). The paper is stapled on so in the future, if we want to swap it out, no big deal. I toyed with the idea of modge podging it on or using the foam adhesive squares but eh, I wasn't that motivated. A few staples did nicely.


You could easily stop here and have a pretty nice corkboard. But we're overachievers and wanted to be able to catch our mail on this "command center". So I stole borrowed some bully clips from work to hang from the edge of our board. Originally, I planned to just use a few small nails and hang them that way. While I was searching the drawers for the plastic case, I began to realize my mother may have taken them with her when she took her tool kit to the new house. D'OH. But I found something  better! Small screw-in hooks! We so fancy.


First, I measured out how much space I was going to need between the hooks. We had enough room for eight of them. I made my marks and lightly tapped a thumbtack to make a starting hole for the hooks to thread on to. They weren't too hard to screw in, you can get about halfway with your fingers before succumbing to pliers.

But be careful you don't accidentally break the hook with your She-Hulk force...
Oops. This is when you cover the broken post with red marker, whistle innocently, and screw a second hook in right next to the broken one...


Here's the finished product! Easy peesy lemon squeezy, right?

Let the pinning begin!


Sunday, April 21, 2013

DIY Party: Wall Decor

I have always been obsessed with fun backgrounds for photos.  It's always fun to be able to take pictures at parties and have something pretty or exciting behind you instead of someone's backyard, right?  Enjoy the compilation I've put together and please share some of your own ideas, I'd love to hear them!

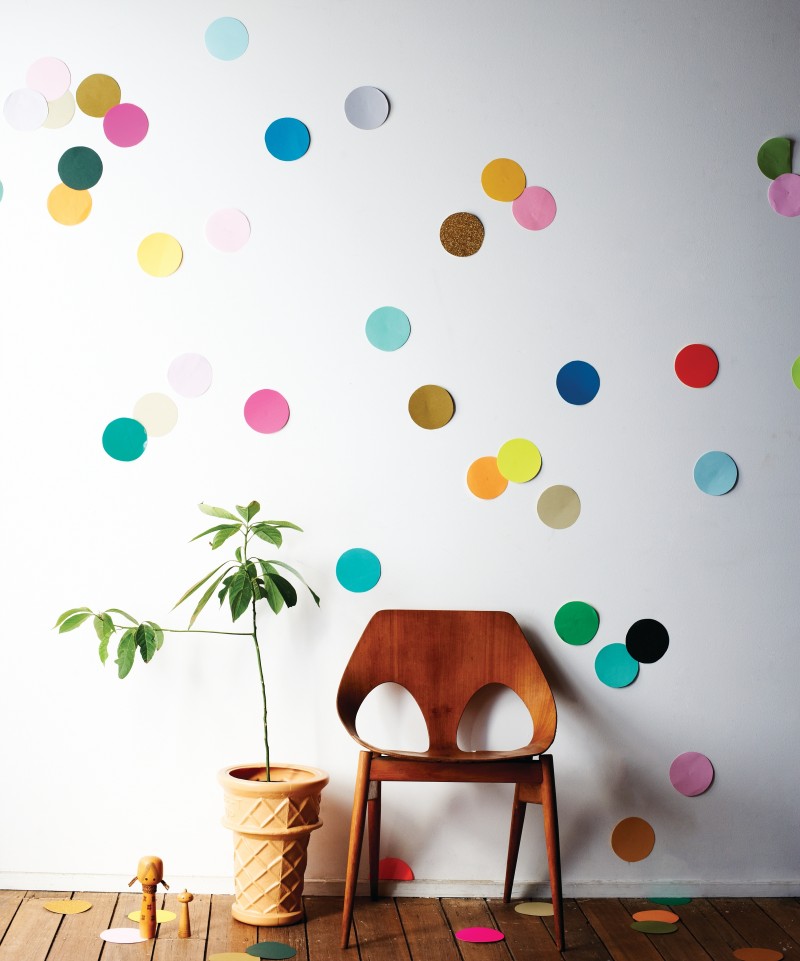
Wee Birdy has a very cute and very simple (READ: easy) idea with this giant wall confetti!

Now, this picture from Oh Joy! didn't seem to have any instructions with it, but I love this idea!  If you take streamers or ribbons or whatever you would like for the background and sandwich the tops of the strands between two pieces of tape, you would easily be able to hang it on a wall or between two posts.
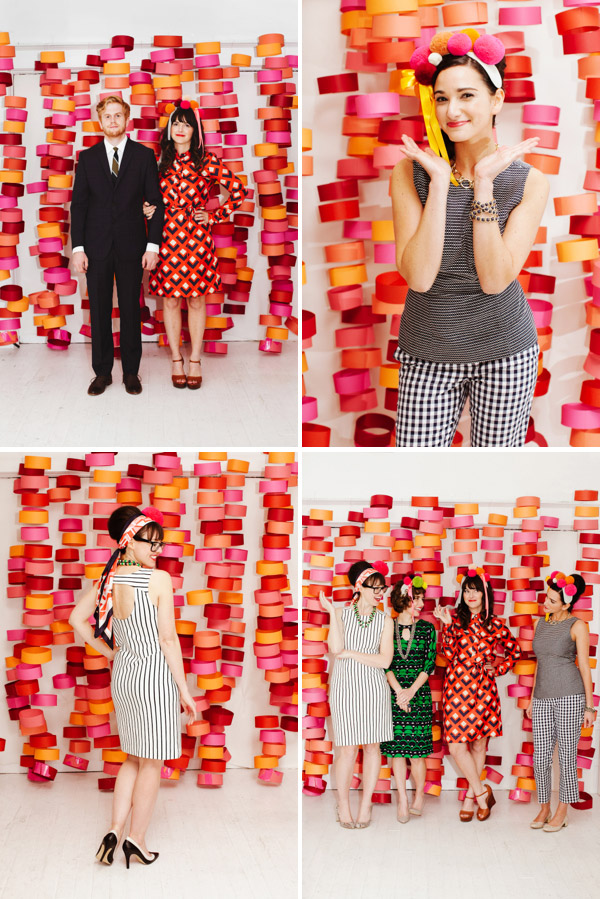
Oh Happy Day had a cute idea for a circle photo booth backdrop, which is absolutely adorable.  However, to make it a little less complicated, you could swap out the sewing machine and just tape the insides of the circles to the thread.

For holiday times, I love string lights as a backdrop in pictures.  Instructables has a neat How To to make the lights diffused and less glaring by covering the little bulbs with ping pong balls!

Speaking of string lights, I have been absolutely in love with this idea since I first saw it on Pinterest.  I have a sincere love for canvas, which is how we plan to decorate most of the rooms in our home once everything gets settled.  Apartment Therapy combines those two things (lights and canvas) with some stickers and spray paint and showcased some absolutely lovely wall art.  I can just imagine the huge ones as cute summer night backdrops or, if you use snowflakes, Christmas party/card backgrounds!

I hope you liked some of these!  Please let me know what you think in the comments below and share your ideas!

Tuesday, April 16, 2013

DIY Party: Games

Hello again!  Welcome to part two of five of the DIY Party series!  Today's topic is DIY party games.  I have found two that I really love (however they're both drinking games, so no kids allowed!)

1)  Battleshots

The Pinterest link took me to this site, which is all in Polish.  However, the concept of the game is pretty self explanatory, especially if you've ever played the ever-popular Battleship.

These two took pizza boxes and drew two grids, one on the inside of the top and one on the inside of the bottom.  You place your shot glasses into the grid as you would with your three ships in the original game (one - two spaces ship, one - three spaces ship, and one - four spaces ship).  The other person does the same with their board and then you take turns guessing where the other's ships may be.  If they call a spot with a shot glass on it, take the shot.

2) Shot Roulette

Here we have another game of shots, but this one is a little more dangerous.  Everyone who takes a turn takes a shot, the problem is you may not know what it is until after you have it in your mouth.

If you have any suggestions for more DIY Party ideas or games, please tell us about them in the comments below!

Tuesday, April 2, 2013

Home Made Coffee Syrups!

Hey everyone!  This project was probably the easiest thing in the world if you can use a stove top.  AND, it's less than the cost of two medium coffees from Dunkin Donuts.  It's a win-win situation.

Ingredients/Tools You Need:

  • Small Sauce Pan
  • 2 Cups Sugar
  • 2 Cups Water
That recipe is for plain liquid sugar for coffee is you're like me and HATE granulated sugar at the bottom of the cup.  As for flavors, you could add in:
  • 1/2 of a cup of caramel syrup 
  • 1/2 tsp. of vanilla extract (preferably clear, but I used the cheap stuff from Stop & Shop) 


Or, if you would like to experiment further, you could add in half of a cup of any berries/fruits to infuse the flavor into the syrups.  I suggest mashing the fruits/berries before adding them to the liquid and strain out any of the seeds and remnants before pouring the syrups into the bottles.  
(Apologies for the crummy phone picture.)

Personally, I didn't want to spend a fortune on fancy bottles (although they are very nice to look at) and I bought them at this Etsy shop.  I gave them as a gift, so I dressed them up a little.  

If you test these out, please leave a comment and let me know how it worked out for you!